Bought A Vintage Kropp On Ebay: What Happened Next..?

Messages
450
Kropp.png

About six weeks ago I thought I'd try DE shaving. That went so well about a week ago I thought I'd try a shavette. Today my first straight razor arrived: a Kropp that could be a hundred years old. AFAIK Kropp were an everyman kind of razor in their day. No frills but reliable; made with good steel.

I've never held a straight in my hands before. It only weighs 34g and is only a little longer than my shavette. For some reason I was expecting a bigger, heavier and even slightly clumsy lump of steel. Instead I'm struck by what a beautiful piece of design it is. A solid spine curving into a thin, almost delicate blade which makes a high-pitched ringing noise when tapped. More like a precision scalpel than the face-axe I was expecting.

Sometimes you pick up a good tool and it just feels right. Perfectly-designed for the job at hand. I haven't shaved with it yet so maybe that's all just my imagination. We'll see.

I'm tempted to dismantle it completely to give it a good clean. Could be nice to make new scales. I do have a chunk of walnut lying around...

The blade is in good condition overall but it looks like I'll have to bread-knife the edge back about half a millimetre or so to clear some pitting.

Unfortunately that also takes me into a larger area of corrosion on one side of the blade which is too big to remove. I'll just have to see how it goes. Hopefully it's only a surface blemish.

The moral of the story: if you buy from ebay don't be afraid to ask for good photographs of the edge area, on both sides. Pitting closer to the spine is just cosmetic but pitting near the edge could make it impossible to hone the blade.

I'll keep a record here of what I buy, the work I do, and how I get on with learning some new skills (honing, stropping, shaving with a straight). Maybe it'll be useful to anyone else thinking about taking up danger shaving.

So far:

Kropp "made & ground in Sheffield" £19
Loupe x30 + x60 £6 from Amazon

The loupe will help to see what I'm doing to the edge of the blade when I try to hone it. It almost certainly isn't as powerful as advertised but then it probably doesn't need to be.

Next up: I need to figure out what to use to grind & hone. I've already got some wet/dry (silicon carbide) paper from P180 up to P1000 (about 500 grit). I think I can use that - on a *very* flat surface - to take the edge back a little. After that, I might try some lapping film from a 1k grit equivalent (about 9 micron?) all the way up to strop-ready with a 0.5 micron film. I'd maybe have to spend £12 or so for a set of lapping film sheets.

If the budget option doesn't work I'll need to buy some stones...
 
Everyone seems to recommend a cheap strop to learn on. Apparently it's really easy to cut them while you're learning a good stropping technique.

Fingers crossed this one from Amazon will do the job. Cost: £10.90

PS: I forgot about the "want to buy" option on the forum. If, like me, you're starting out with straight razor shaving might be worth asking if forum members have any old, unused gear they'd like to sell.
 
Good advice. By chance I just bought another razor from a forum member (a shave-ready Bagnall wedge) so that will give me a benchmark edge.

It will also be nice to compare different types of razor. I think the Kropp is full hollow judging by the very light weight and the way it "sings".

I don't know if I'll be able to sharpen the Kropp but I definitely want to try. I'll learn something either way :)
 
Took the scales off today so I could give everything a good clean.

I began by filing down the end of the tang pin. AFAIK this is a short brass rod with a peened end so filing the top off ought to allow you to pull the pin out. Or so I thought. I filed it down, started gently prising the scales apart and then... snap! They're only black plastic so it's no big deal. Gives me a good excuse to make some decorated wooden scales.

On the inside of the scales was the number "277". The razor model?

For the new scales I think I know what I want to do. Since Kropp made razors for the working man, a slogan from the early 1800's short time movement inscribed on the sides: "eight hours labour, eight hours rest and eight hours for what you will".

Next, I gave the blade a rough clean up with P500 and P1000 paper. A proper polish will come later. For now I just want to quickly rip through corroded/pitted patches and find out how deep they go.

Good news! The corrosion near the blade edge turned out to be quite shallow. No need to grind the edge back to find good steel. Getting that wrong could have messed up the blade geometry so I'm glad I won't have to.
 
First idea for new scales:

sample-1.png


The plan is to do something simple with acrylic paint and a Tru-oil finish. These are easy materials to work with.

I've no idea how I'd do the text.. Maybe I can get a stencil made somewhere. I'd struggle to do a good job freehand.

The bells should be much easier. Apparently singing razors were sometimes called "le grelot" (the little bell). The sound is a bit like pinging a wine glass.

Without the scales, I weighed the blade at 22g.
 
Sharpening is an adventure and an avocation. Nothing is better than gettin an edge on something you want. I have not delved into the realm of straight razor sharpening, mostly because I fear I would be tempted to try to shave with one.

Be patient with yourself, eh.
 
Terror is a great teacher. You learn to be patient, careful and how to make controlled, deliberate movements with the blade. Although you *could* do serious damage in practice the only real risk is the odd nick. I've been enjoying learning to use my shavette.

Some parts of the face are more difficult than others. It takes me a while to get round the mouth & chin area. Surprisingly, the neck is really easy (apart from the Adam's apple). Just tilt your head back to stretch the skin.

That seems to be the secret: skin-stretching. Once you get "set up" for the area of the face you're working on the blade just glides across the skin.
 
In case you've been wondering what a budget x30-x60 Loupe from Amazon can do, here are some photos.

lupe-30-60.jpg

This was taken with the "x30" lens. The blade was resting on paper - you can see the paper grain clearly.

lupe x30.png

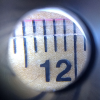
The next two with the x60 lens. First, the millimetre scale on a ruler to give you an idea of the magnification:

lupe x60 ruler.png

This is the toe of a second (shave-ready) razor which I bought recently, again with the x60 lens:

lupe x60 Bengall edge 1.png

The lupe has two built-in LED lights which seem to work really well. If you pick the one farthest away from the lens you're looking through it gives an angled lighting which brings out texture in a surface.

No doubt there are better options but for £6 I think this looks pretty good.
 

Attachments

  • lupe x30.png
    lupe x30.png
    876.4 KB · Views: 5
I've been quite busy but finally the new scales are fitted. Functional rather than beautiful. Things didn't quite go as planned.

Kropp-with-new-scales.png

A quick run-through of the process:

* Cut rectangles out of a block of wood (walnut) with a tenon saw.

* Cut out the rough shape of the scales with a coping saw.

* Stick the two pieces together with double-sided tape. Now you can sand them down to the final shape and they'll be perfectly equal. P80, P120, P240 sandpaper.

* I used acrylic artists' paint to try to create a gradient effect. This can be applied as a solid colour or as dilute washes. If an area is too dark after applying a black wash, you can also sand the wood down a little bit to "dilute" it.

When you apply washes the grain will rise so you need to knock that down gently with a fine-grain sandpaper.

* Tru-oil finish. You can get a glassy smooth finish by applying lots of thin layers but my old bottle of tru-oil had turned to a gel the consistency of snot. I just rubbed on a couple of thick layers and smoothed it out as best I could manage with a finger.

I think walnut grain can be filled by wet-sanding with tru-oil. But not with my tru-snot. If I was doing this as a business I'd be bankrupt but the end result is good enough for me even if it isn't perfect.

* Peening was much easier than I thought it would be. Except for the holes. "I don't need a drill press!" I said. "I can do it by eye!" I said.

Nope. I really messed this up (as you can see from the above photo). Nevertheless, the blade does seem to swing round through 270 degrees and closes centered so I got away with it.

But the pin-bashing part was quite easy. My peening kit:

peening-kit.png

A spoon makes an excellent ball hammer :)

The axe was used as an anvil. A solid lump of metal means the hammer-blows aren't cushioned so all the force goes into the head of the pin.

Flush-nosed nippers are handy to trim the pin to the perfect length (about 1mm?). Too much would take forever to hammer down.

Next step: honing. All I've done to the blade so far is rub out any corrosion marks and clean out the jimps. It could be polished up to a mirror finish. If I was more patient. When I get a couple of hours to spare I'll probably just want to get it honed & try it out.

Note that the smart thing to do is hone last. It's much easier and safer doing all the other tasks with a blunt blade. In fact, if I was fitting new scales to a shave-ready razor, I'd be tempted to deliberately blunt the edge.
 
Last edited:
My introduction to straight razor shaving was with a Kropp that I bought from a forum member. It was "shave ready" and in good condition. It's my least favourite SR so I only get to use it when I feel sorry for it, it's always at the back of the queue lol. I've managed to sharpen it better with my finishing stone but it has taken a lot of work in comparison to other razors.

Although it's my least favourite razor, it has a sentimental value, I had my first shaves with it, I learnt to strop a blade with it and to sharpen the blade on a honing stone too.
 
This one feels quite delicate. With the new scales it only weighs 28g. Honing/stropping could be challenging. I guess it will need a very light touch to avoid flexing the blade.
 
Back
Top Bottom